Total solar eclipses are relatively rare. They happen somewhere on the earth every few years, but on average it is more than 300 years before a total solar eclipse will be visible in the same place twice. So, when I heard earlier this year that there was going to be a total solar eclipse passing just to the north and east of where I live, I decided to make the 4 hour drive to a spot pretty close to the center of the totality band near Mackie, Idaho, and try to photograph the show. Special thanks to Tom and Amber for letting us come crash on their land with them – thanks, guys!
Eclipses have always fascinated me, though I admit that I did not realize how rare total solar eclipses are. I remember seeing an eclipse when I was in high school – but that was only a partial eclipse, and where I was living it was only slight. In fact, the last time that a total solar eclipse touched the continental United States, I was only 2 years old and did not live anywhere near the totality band. The last time a total solar eclipse passed from coast to coast in the United States was on June 8, 1918, almost 100 years ago. Learning not only about how rare an eclipse like this is but also the celestial physics behind exactly what is happening only doubled my resolve to make sure I was there with a camera ready to capture whatever I could.
WARNING: Photographic geekery is just around the corner for the next several paragraphs. If you just want to see some pictures, skip ahead a bit.
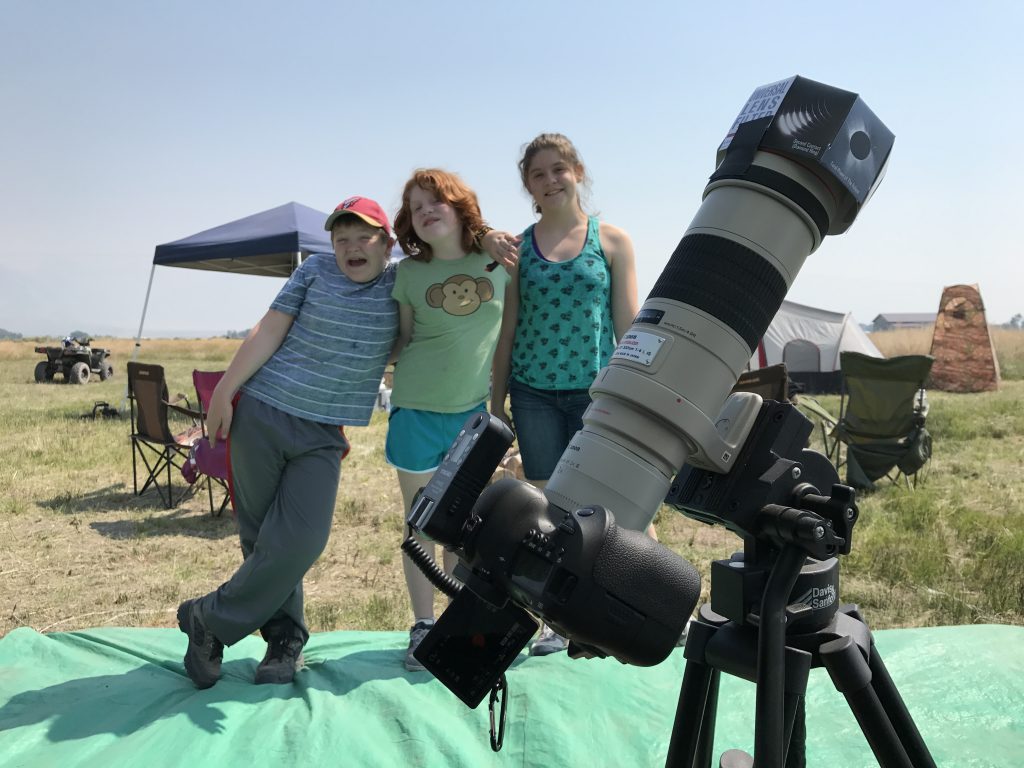
After doing a lot of research on lenses and deciding what kinds of shots I wanted to capture, I opted to rent a Canon 300 mm F4L lens from LensRentals.com. I added a 2x coupler that effectively doubles the focal length to 600 mm. I wanted the sun to fill between 10 and 20% of the vertical height of the frame, because I wanted to capture the corona as far out as I could during full totality. Zoom in too far, and you crop off corona. Don’t zoom in far enough, and the sun is too small in the frame to capture some of the smaller details such as the solar prominences, the chromosphere, etc. I knew I would be shooting on a full-frame body (my brand new Canon 6D Mark II) and the math for this lens worked out just right to have the sun be the size I wanted in my frame.
I also bought a simple cardboard and solar film filter that fit over the end of the lens for shooting before and after totality.
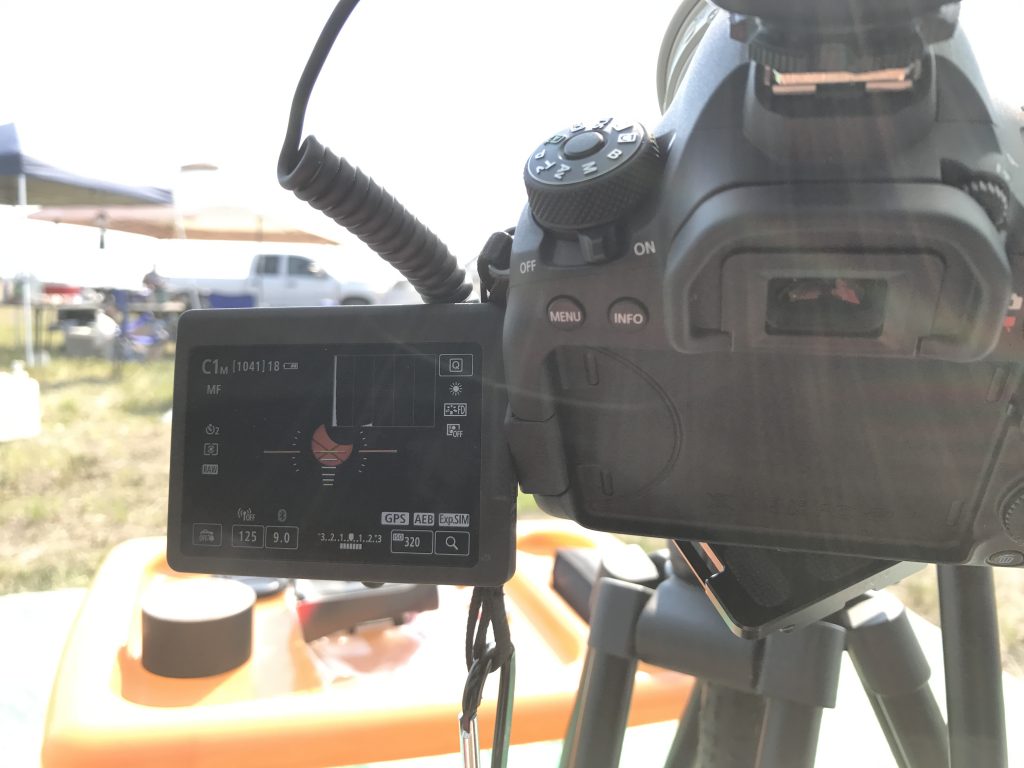
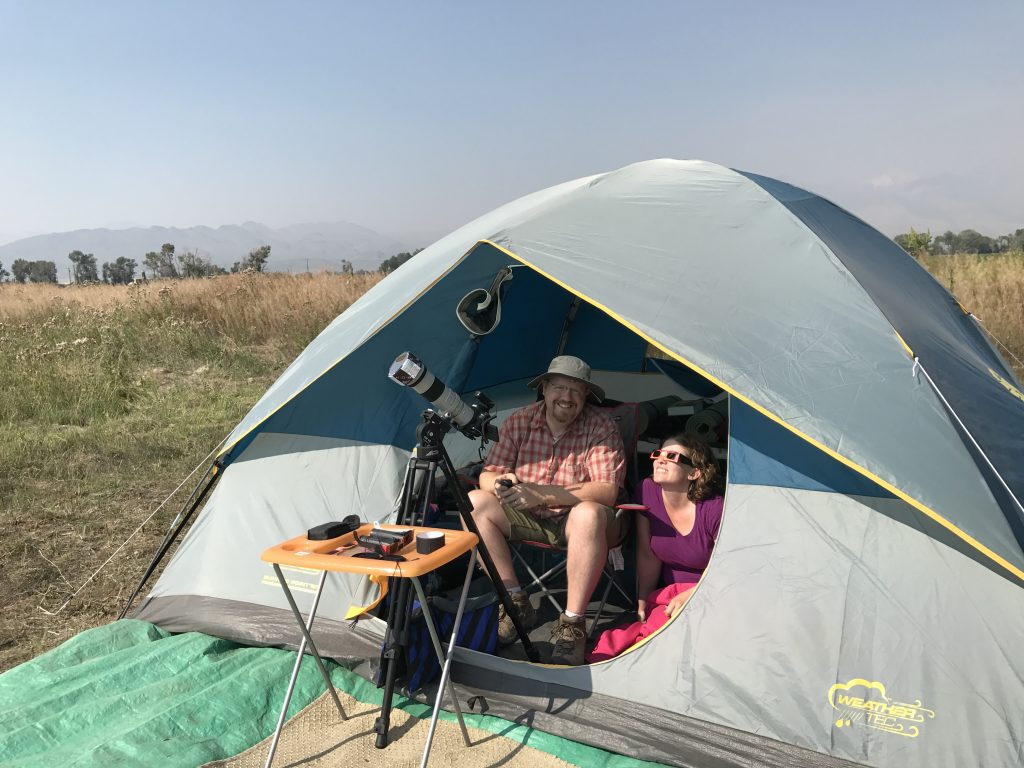
Here’s a shot of my gear all set up for the shoot:

I also used a radio remote shutter trigger to avoid shaking the camera by pushing the shutter button, and I mounted everything on a very sturdy video tripod weighted down with sandbags to provide as stable a platform as possible. I also found that the fluid head on the video tripod was far better for tracking the sun during the eclipse than my regular photography tripod, as it was far easier and smoother to tilt and pan.
As soon as I had everything set up I flipped out the articulating LCD screen on the camera so that I could switch to live view and set the focus on the lens manually. I read lots of recommendations about setting the focus and then taping down the focus ring so it never moves, but I found that anything more than breathing on the focus ring (including trying to tape it down) moved it enough to throw things out of focus, so I just set it and left it. I also found that the drastic temperature change that happens during the eclipse subtly changed the optics of my setup such that I needed to adjust the focus right before totality started and again right after it ended when things started to warm up.
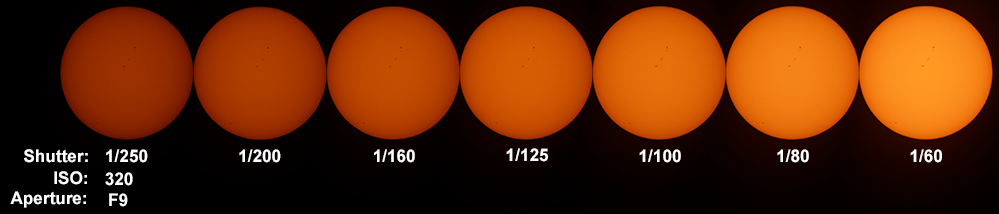
Everyone always wants to know what settings I used for shooting, so that they can do the same with their camera. However, any settings I share are really only applicable to this camera with this set of lenses and this filter. Whatever you use to shoot the eclipse will undoubtedly need different settings. In the interest of sharing exactly how I captured my images, I’ll list my settings below. If you are from the future and trying to shoot an eclipse in your area, you’ll want to practice first and adjust your settings to fit your specific imaging equipment. I was able to practice with this setup several days in advance, and that let me settle on the following settings for the partial phase of the eclipse:
F9, ISO 320, with auto exposure bracketing set up to take shots at 1/250, 1/200, 1/160, 1/125, 1/100, 1/80 and 1/60 seconds. The 6Dii allows you to set up the auto exposure bracketing such that a single press of the remote shutter trigger fires off all 7 shots in very rapid succession (about 1.5 seconds total to capture all 7 shots).
Here is what the midpoint shot (1/125 second) looks like straight off the camera (no adjustments at all):
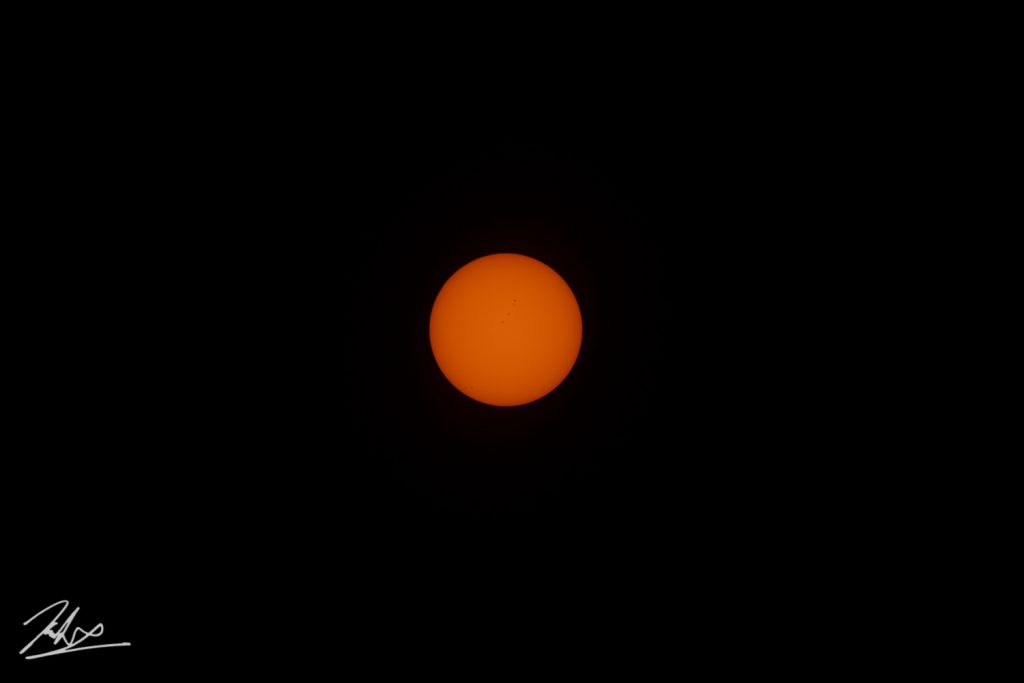
I was shooting in RAW, so I had lots of flexibility with playing with the exposures in post, but I found that I really didn’t need it. Here is the sun from a burst of 7 shots, with auto bracket exposure. Note that the darkest one is just a little too dark, and the lightest one is just a little too light. The middle is the goldilocks shot. Since I didn’t know beforehand what the weather was going to be at my shoot location, I kept the AEB enabled just in case I needed the flexibility that all the extra exposures provide.
I set all the above into my 6D’s C1 custom preset setting, so that I could flip to it anytime I wanted. The 6D (and most of the professional or pro-sumer bodies from Canon) offer one or more custom preset settings on the multifunction dial, so I set these into C1, and my best guess for totality exposure settings into C2.
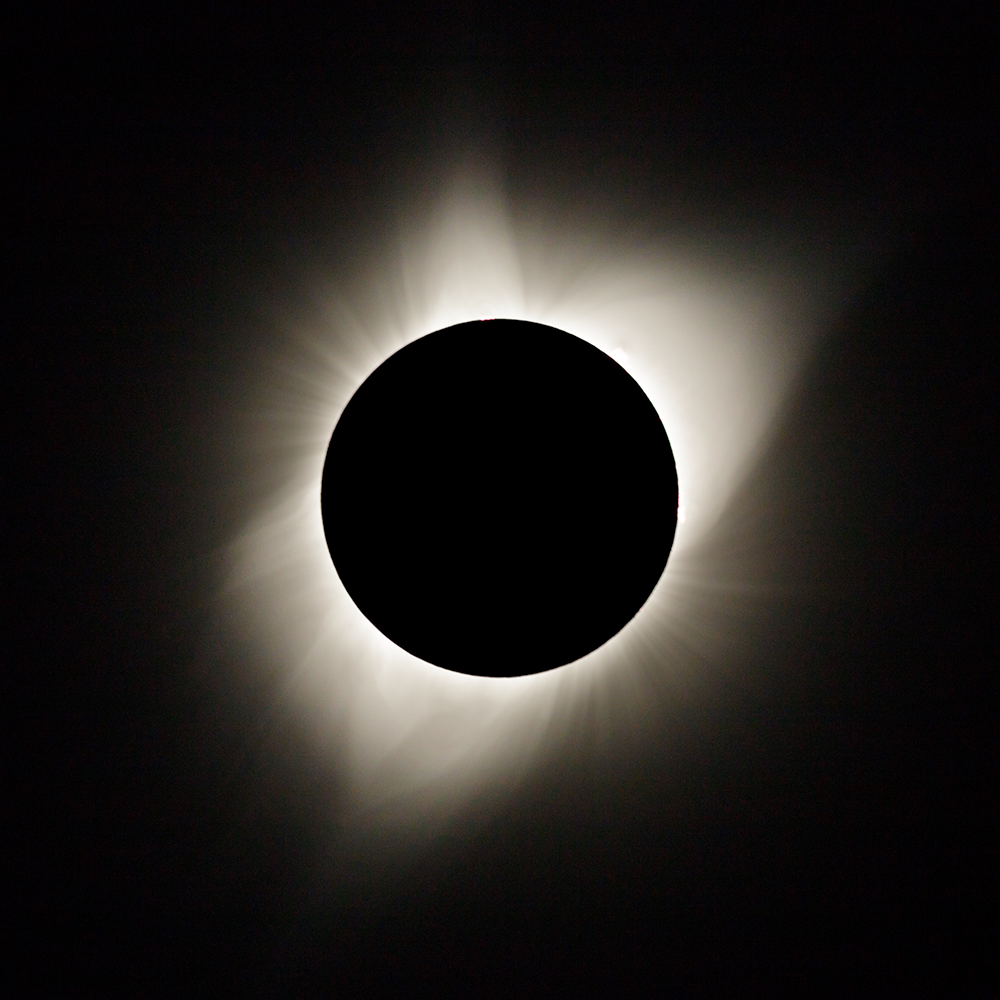
Not having a totally eclipsed sun hanging out in the sky to practice on, I had to take my best guess about what settings to use during totality. During my research I read in various places that the corona during totality is roughly similar to the brightness of a full moon, but I suspected it would be substantially brighter than that at the very inner edge of the corona, and that is where I wanted to start my exposure. My plan was to start at a fast shutter speed of 1/4000 second, F11, ISO 200, with auto bracketing up to a shutter speed of 1/250 in a 7 shot burst, then bump up my starting shutter speed by one tick of the shutter speed control wheel (1/2500) and fire another 7 shot burst that would then end at 1/200. Click wheel, click shutter speed, wait for burst to complete, lather, rinse, repeat. I practiced this a few times, and was certain that I’d be ready as soon as totality hit… but I was so caught up in the moment that I completely forgot to change to my C2 totality settings, and nearly missed it! Luckily, I realized about 30 seconds into totality that I’d forgotten to switch the dial, and was able to get the shots I wanted. I wound up shooting all the way from 1/4000 second up to .4 seconds, all at F11, ISO 200 before Bailey’s beads made an appearance on the far side of the sun and it was time to switch back to my C1 settings for a few quick diamond ring shots and then put my solar filter back on to shoot the moon exiting stage left.
On the left is the dimmest shot I took during full totality. Note you can easily see the chromosphere and prominences. On the right is the longest (brightest) shot I took during full totality. It may be a little difficult to see on this website, but the corona extends all the way to the edge of the frame, which is exactly what I was hoping for.

For the “gee-whiz” file: I managed to get 302 shots using this approach during the last 1:22 of totality. I’m *really* glad I received my new 6Dii in time, as my old camera (Canon 60D) has a much smaller buffer that would not have been able to shoot that quickly.
I could not stop shooting long enough to look at the shots to see if I was happy with what I was getting and to make any adjustments, but I’m very pleased with the results. I have not had time to start to build a large composite of the corona, as the technique for doing that will take several days to get right with lots of trial and error. Instead, here is one of my medium-exposure shots of the corona right at the point of totality in my location:
Once I have finished processing all the images and putting some composites together, I’ll be back with another post that is more of a slideshow of the final images.
Leave a Reply